There are several action can be performed, such as adding new DNS record, editing or deleting existing DNS record.
Please follow the steps below to manage your DNS record in DirectAdmin control panel.
* Please replace yourdomain.com with your actual domain name.
Adding new DNS record
1. Login to your DirectAdmin control panel (EG. http://yourdomain.com/da).
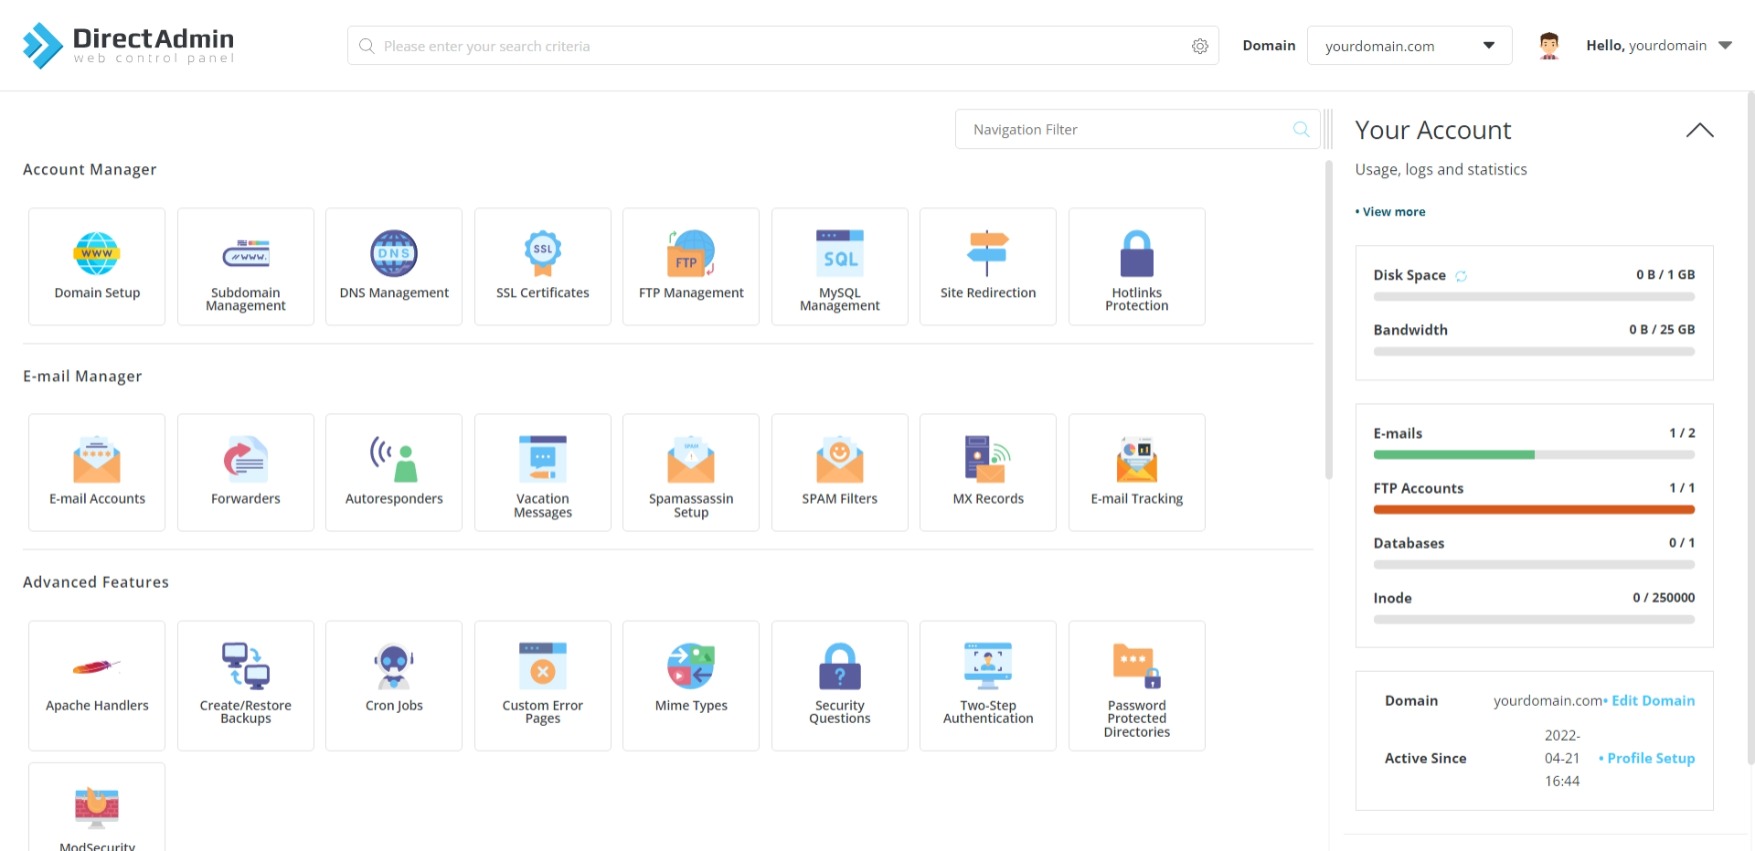
2. Under "Account Manager", choose DNS Management.

3. Click Add Record to add new DNS record.
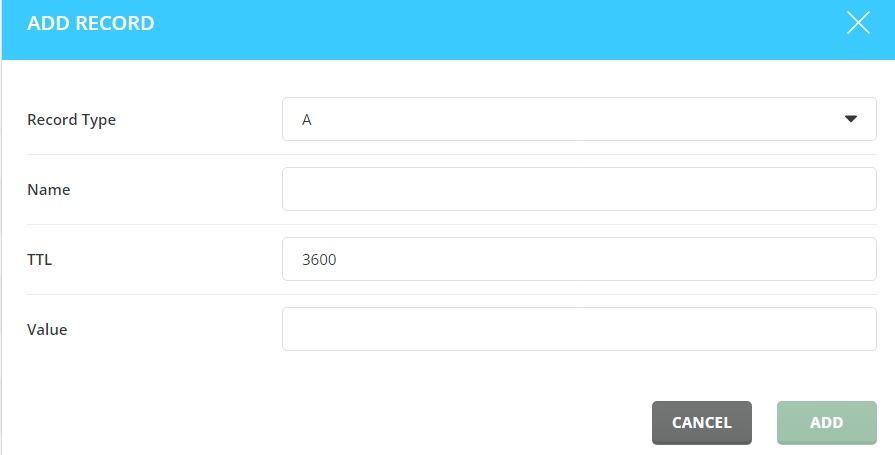
4. Under "Add Record":
Record Type: Select the DNS record type from the drop down menu (EG. TXT/A/CNAME/etc.)
Name: Name of DNS record
TTL (Time-to-live): 3600
Value: Enter DNS record value
5. Click Add to save the changes.
Editing the DNS record
1. Login to your DirectAdmin control panel (EG. http://yourdomain.com/da).
2. Under "Account Manager", choose DNS Management.
3. In DNS Management list, click on ![]() icon to edit the record.
icon to edit the record.
4. Make necessary changes on the record.
5. Click Save to save the changes.
Deleting DNS record
1. Login to your DirectAdmin control panel (EG. http://yourdomain.com/da).
2. Under "Account Manager", choose DNS Management.
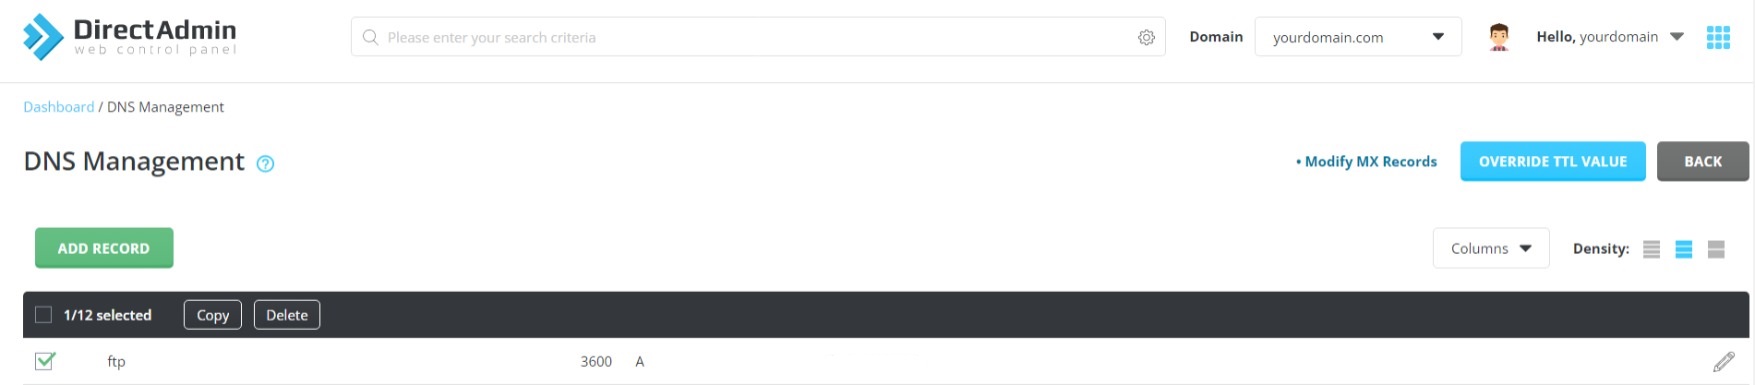
3. In DNS Management list, check the DNS name that you wish to delete.
4. Click Delete, then Delete again to remove the DNS record.