1. Start Windows Live Mail.
2. On the top menu, select the tab "Accounts" and click onto icon Email.

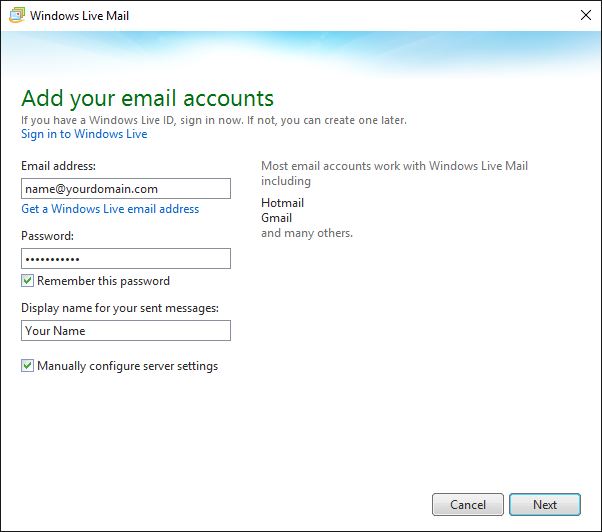
3. A menu "Add your email accounts" will appear, fill in the following:
Email Address: [YOUR EMAIL ADDRESS]
Password: [YOUR EMAIL PASSWORD]
Display name for your send messages: [YOUR FULL NAME]
Manually configure server settings: YES
4. Click Next button to proceed.
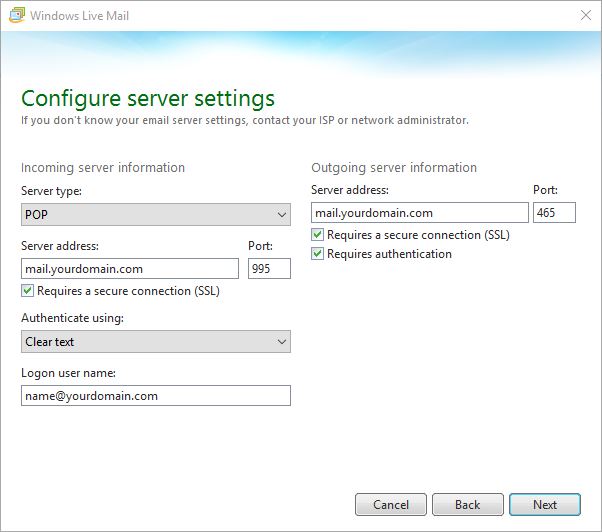
5. Under "Configure Server Settings", fill in the following information:
* Replace yourdomain.com with your actual domain name.
[Incoming server information]
Server Type : IMAP or POP3
Server address : mail.yourdomain.com
Port: 993(IMAP)
Port: 995(POP3)
Requires a secure connection (SSL): YES
Authenticate using: CLEAR TEXT
Logon user name: [YOUR FULL EMAIL ADDRESS]
[Outgoing server information]
Server address : mail.yourdomain.com
Port: 465
Requires a secure connection (SSL) : YES
Requires authentication : YES
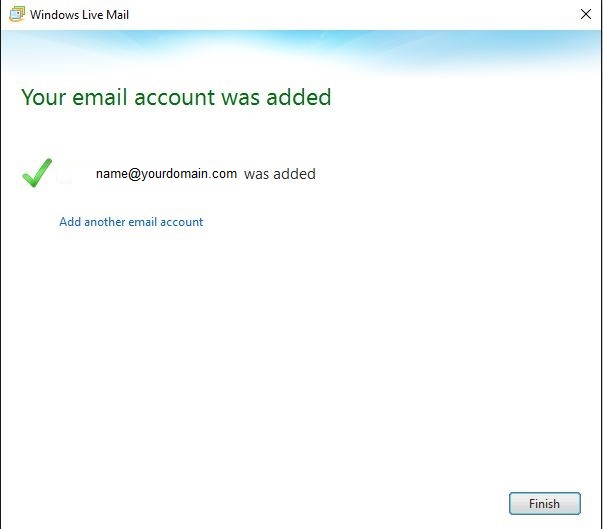
6.�Click Next button to proceed, after that click Finish to complete the setup.
* Replace yourdomain.com with your actual domain name.
Note: IMAP will synchronise your email content with the webmail, POP3 will download the email from the server and delete it from the mail server.